6.13.2013

Thrifty Thursday: Full Lenghth Mirror

I have been dying to get my hands on one of these!  And I finally came across one at Goodwill for a price I was willing to pay.  
$30 bucks!

Here's a side by side Before/After:

It  looks (I mean "looked"!) identical to one I had in my bedroom growing up!  In fact, this is why I have been dying to get one:  I loved it as a teenager! 
 Call me vain, but one thing I always require is a full length mirror!  And the flimsy one from Wal-Mart just wasn't working out....I don't think it liked me! 

Anyways, this guy was pretty dusty, but in near perfect condition!    

He is heading straight to my closet, but I still have to freshen him up with some paint!
I used Valspar's Meadow Breeze, then topped it with Valspar's Antiquing Glaze:


 This is the mirror I had before:

Now it looks like this:

He won't be seen by too many people since its in my closet, but at least he is nice to me and I like to look at him!

6.11.2013

Old Desk gets New Life!

As I was browsing Goodwill I came across this Amazing piece!  I'm sure many people passed it by, not knowing what it was.  But the moment I saw her I knew EXACTLY what she was, and I snatched her up and brought her home! 

 Its the top to an old antique secretary desk.  
The poor thing had her legs removed!  So sad! But all of her hardware was intact,

and when I opened her up she was so smooth...almost perfect!  
Her wood was a little beat up, but thats about it!
I paid $15 for her!

But before i could begin transforming her, I had to get her some new legs. She was built with square shaped legs, so I went to Home Depot and picked these up for about $10 each.
I used long screws and large washers to attach them. 
(they fit perfectly where her other legs were removed)
I painted her with my chalk paint in Valspar's Polar White (yes, I use this ALL the time!)

After I sanded her, I thought it would be really fun to add some stenciling to her front.
I got this stencil at Hobby Lobby, but didn't follow the directions! ha
I just taped it on, used a normal foam brush, and dabbed on the paint.  I used acrylic paint (basil green)

After stenciling, I took sandpaper and lightly went over where I had stenciled.

I glazed her after I stenciled so the glaze would go over the stencil too.  I chose Martha's Metallic Glaze for this piece

And here's why:
This particular glaze really "sticks" to the places that have been sanded and darkens them up really good!  Because this piece had a dark finish, and I added light unfinished legs, I wanted to make sure the  piece would look uniform when complete.
 You can see in this picture how the edges of the leg darkened enought to match the original top piece:

 Here she is all finished!
I used her original hardware because I think its beautiful!
Total cost for her: $55

Now I just need to find a spot for her!

Party Links:
Thrifty Decor Chick

6.10.2013

Kitchen Island Update

Happy Monday everyone!  So I finally finished a project that has been in the works for awhile! 
A few months after we moved into our house, I added a few things to the kitchen.  Since then my mom has wanted the same thing in her kitchen, and I'm happy to report that we finished!
I will start with a quick explanation of what we did to OUR kitchen first:
Ok, I added a bead board backsplash.  


Then I liked it so much I wanted bead board on the island:

For the island I used bead board wallpaper, and painted it blue to give my kitchen a pop of color!

Now, on to my parent's kitchen!  
My dad is very conservative and it took me many weeks to finally convince him to let me do what we did!  He didn't want us using an accent color, and he didn't want us to paint ALL the cabinets...just the island.  So we respected his wishes! 
This is what their island looked like before:

First, we added bead board to the sides and back of the island, along with trim around the bottom (there was nothing before....ugly!)  We used the pre-cut packs of bead board from Home Depot.  To put it up, we used small nails, but also liquid nails for extra reinforcement.

Before we painted, I took the cabinet doors and drawer faces off and sanded them down.  I then applied a primer.  I used a semi gloss white latex paint.

Here's the back:
SO pretty, don't you think?!  It definitely brightened up their kitchen!

 Then we moved on to the backsplash.  We also continued it across the wall, and finished with chair rail trim.  We painted it white to match the island, then painted above it with 
Martha Stewart's Spanish Moss

My mom loves it, and even my dad was pleased.....which makes me happy (considering I was the one that pressured him into it! haha)
Thrifty Decor Chick

6.06.2013

Thrifty Thursday: TV Tray

This week I found two AWESOME TV trays!  Well, I know for sure 1 of them is. 
This one is huge and solid! When I saw it I gasped and startled my sister! 
Cost: $3.00


This is the one I wasn't sure was actually a TV tray, but it didn't take much to turn it into one:
Cost: $8.00 (total cost with hardware that I added)

I painted it with a cute acrylic blue I had on hand, and added some fun hardware to the sides

It turned out super cute, but it was small compared to the other one

And here's the other one: 
(sigh)I'm in love! 


I again used an acrylic paint (French Blue)


 And I'm going to keep this one on my coffee table!
What do you think? Did I make a good choice between the two?!

Party Links:

6.03.2013

Room Shuffle

My oldest son (my 8 year old) has been begging me all year to have his own room.  We have a spare room that has been set up as a guest room.  Him and his younger brother have always shared a room, and I just figured they would always share one.  I had strong opinions about children sharing rooms....that its better for them!  But I'm learning that sometimes what you think is best for your child isn't always best. Some kids need different things....like my oldest son.  I started to realize that his own room might be a better option, for ALL of us!

So I promised him that this summer we would make the transition.  Both of the boys are thrilled.  So throughout the summer I will be posting the progress of both rooms as we make changes.

So far I have cleared out the spare room, and I found a dresser for him at Goodwill for $30.  It was pretty hammered, but solid and sturdy.

My oldest is a HUGE fan of Star Wars, which will be his theme.  But he told me he wanted Black and Grey for his colors.  When he told me black and grey, I knew I wanted his furniture to be black, so I picked out Valspar's Lincoln Cottage Black, and started on his dresser.

Here is the poor dresser pre-makeover:


  This is after the paint, before sanding:
(I used my chalk paint method)

I kept it like that for a few days because I got busy and didn't get a chance to sand it,  but it started bothering me!  It just seemed so BLAH!!  I don't know why, but I finally came up with something that I thought would jazz it up a bit!

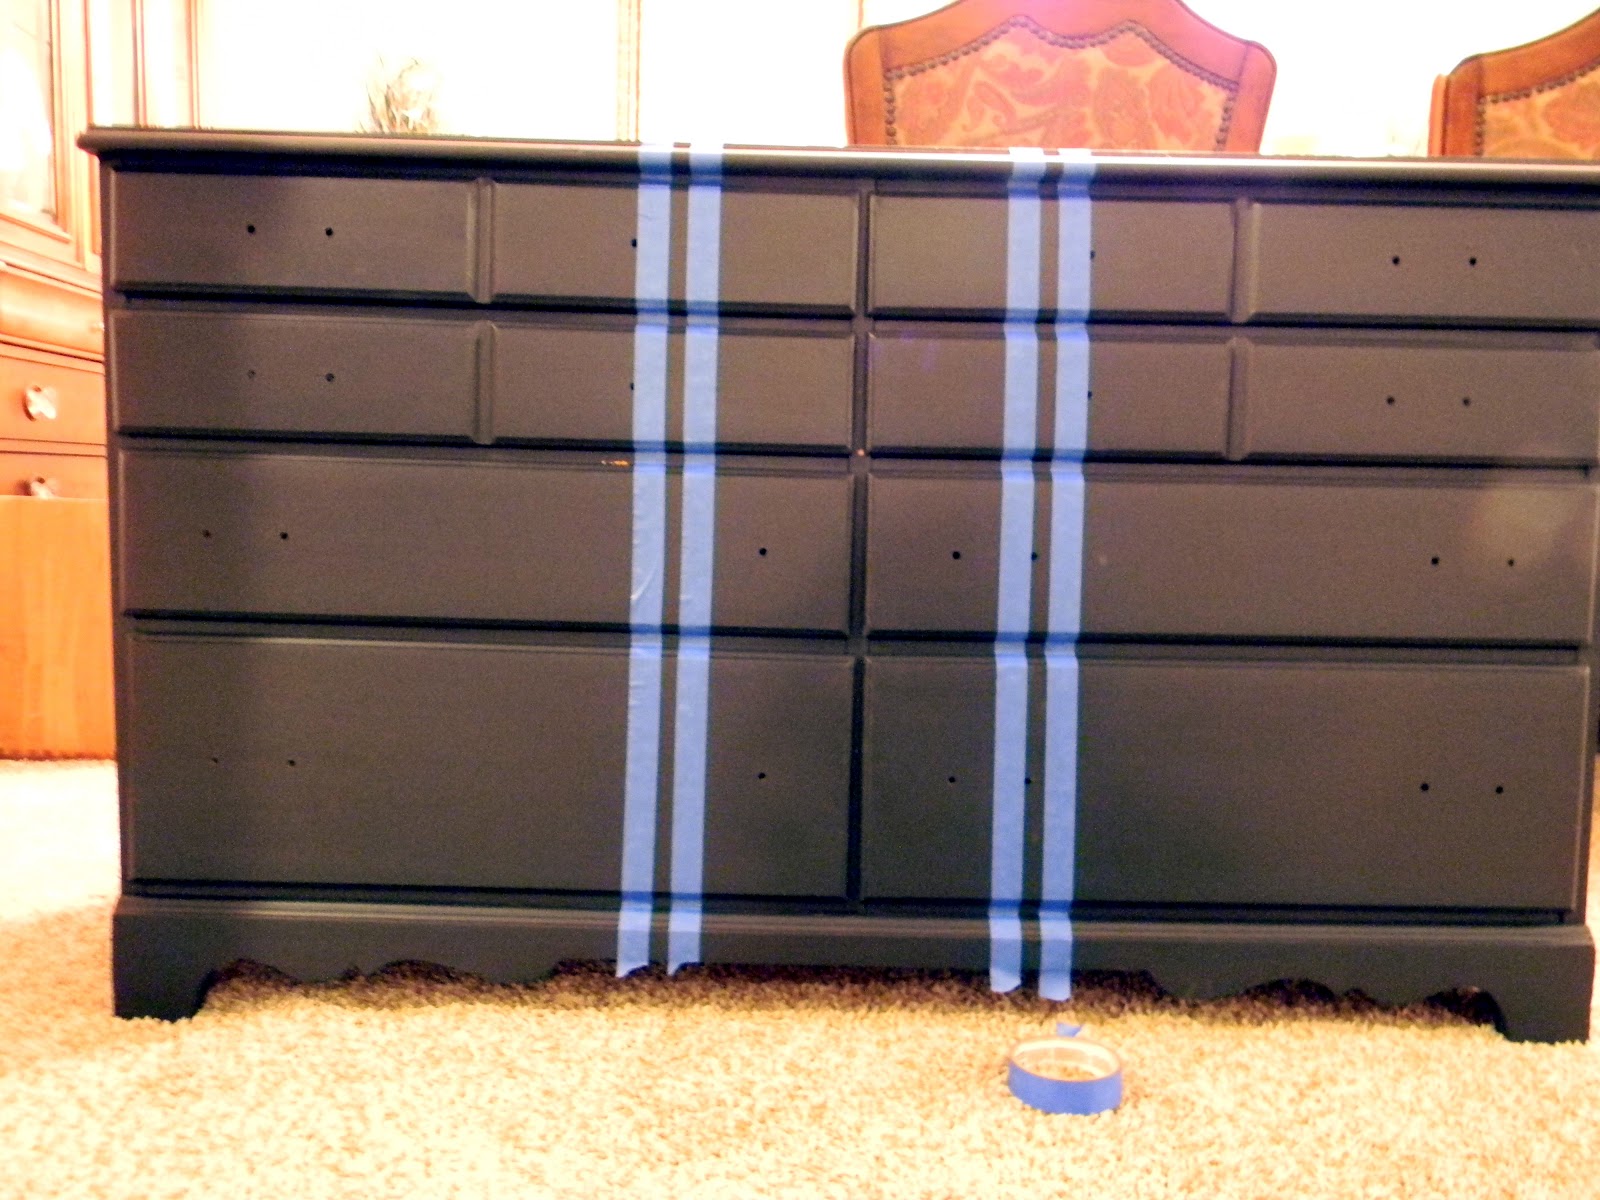
 This is what I did:
Pretty cool, huh?!

It was very simple.  I just taped off where I wanted to paint the stripes.  I didn't measure.  I didn't use a level.  I just eyed it!  I just don't have the patience for that kind of stuff, haha!
And I knew I would be distressing it so it didn't need to be perfect!

This is how it looked before I sanded:

 Here is after:

I used Valspar's Simply Gray, then I distressed, and then I used Valspar's Antiquing glaze.  I finished with polycrylic

I still haven't found hardware that I like, but I think it looks really cool....and the best part is that my son LOVES it!!! So that makes me like it even more!
What do you think?!


Related Posts Plugin for WordPress, Blogger...